Analytics integration
Google Analytics metrics are integrated in the site in two places:
- The footer
- Blog singles

We use last week’s data to update the posts once a week. This is done via three pieces:
- Zapier fetches the data from Analytics
- Sends it over to a serverless function hosted in the frontend project
- That function updates a Sanity document with the top posts information
Zapier integration
Section titled “Zapier integration”Zapier runs once a week, on Mondays at 12AM (UTC + 2). It fetches the information from Analytics and calls our webhook / serverless function. For any questions regarding this part of the integration, reach to Mihai Dreve.
Serverless function / webhook
Section titled “Serverless function / webhook”Found at netlify/functions/analytics.js in the frontend project.
const payload = JSON.parse(event.body || "{}");
console.info("PAYLOAD");console.info(payload);
const blogs = payload[0].top_blog_posts;const validJson = blogs.replace(/'/g, '"');
const parsedBlogs = JSON.parse(validJson);
We first capture the payload coming from Zapier. We do have this log here because Zapier does not allow to see the payload that is being sent, so we need to log it to be able to make any changes. These logs can be found in the Netlify dashboard -> functions -> analytics.
The payload looks like this:
[ { "top_blog_posts": "[ ['Essential PowerShell Commands: A Cheat Sheet for Beginners', 'netwrix.com/en/resources/blog/powershell-commands-cheat-sheet/'], ['How to Run PowerShell Script from Task Scheduler | Netwrix', 'netwrix.com/en/resources/blog/how-to-automate-powershell-scripts-with-task-scheduler/'], ['Common Types of Network Devices and Their Functions | Netwrix', 'netwrix.com/en/resources/blog/network-devices-explained/'], ['Download and Install PowerShell 7', 'netwrix.com/en/resources/blog/powershell-download-install-guide/'], ['How to Install & Use Active Directory Users and Computers (ADUC)? | Netwrix', 'netwrix.com/en/resources/blog/how-to-install-and-use-active-directory-users-and-computers/'], ['Explore Our Blog Articles | Netwrix', 'netwrix.com/en/resources/blog/'], ['An Overview of the MGM Cyber Attack | Netwrix', 'netwrix.com/en/resources/blog/mgm-cyber-attack/'], ['PowerShell Environment Variables', 'netwrix.com/en/resources/blog/powershell-environment-variables/'], ['The Largest and Most Notorious Cyber Attacks in History', 'netwrix.com/en/resources/blog/biggest-cyber-attacks-in-history/'], ['How to Run PowerShell Script: A Complete Step-by-Step Guide | Netwrix', 'netwrix.com/en/resources/blog/how-to-run-powershell-script/'], ['Windows PowerShell Scripting Tutorial for Beginners | Netwrix', 'netwrix.com/en/resources/blog/powershell-scripting-tutorial/']]" }]Not very dev friendly but it is what Analytics provides. We get the inner array of posts and then replace all single commas by double commas to be able to parse the JSON and obtain workable arrays.
const repeaterAll = (    await Promise.all(        parsedBlogs.map(async (blog) => {            const [blog_title, blog_URL] = blog;
            if (blog_URL === "netwrix.com/en/resources/blog/") return null;
            const slug = extractPath(blog_URL);            const postInfo = await sanityClient.fetch(                `*[_type == 'blogs' && attributes.slug == '${slug}'][0]{_id, title}`            );
            const key = Math.random().toString(36).substring(2, 11);
            return { blog_title: postInfo?.title, blog_URL, _key: key };        })    )).filter(Boolean);
const repeater = repeaterAll.slice(0, 10);
await sanityClient.patch("top_posts").set({ repeater }).commit();
When we have our array, we map it and build the array that we are going to patch into Sanity.
First thing we do is filter out the index page, so we return null from that one. We will later on filter out all null values from our new repeater array.
We only receive the title in English from Analytics, so we need to fetch the actual blog from Sanity to get the full translated title to add to our patching array.
To do this, we use the extractPath helper that uses regex to extract the slug from the URL.
We also generate a random key because Repeater objects in Sanity need for each of their children to have one to differentiate them.
We build the new array using the object of translated titles, the blog URL and the key we just generated.
After that, and just in case our home page did not make it into these 11 results (unlikely, but possible), we get the first 10 array items and patch them into Sanity.
Sanity
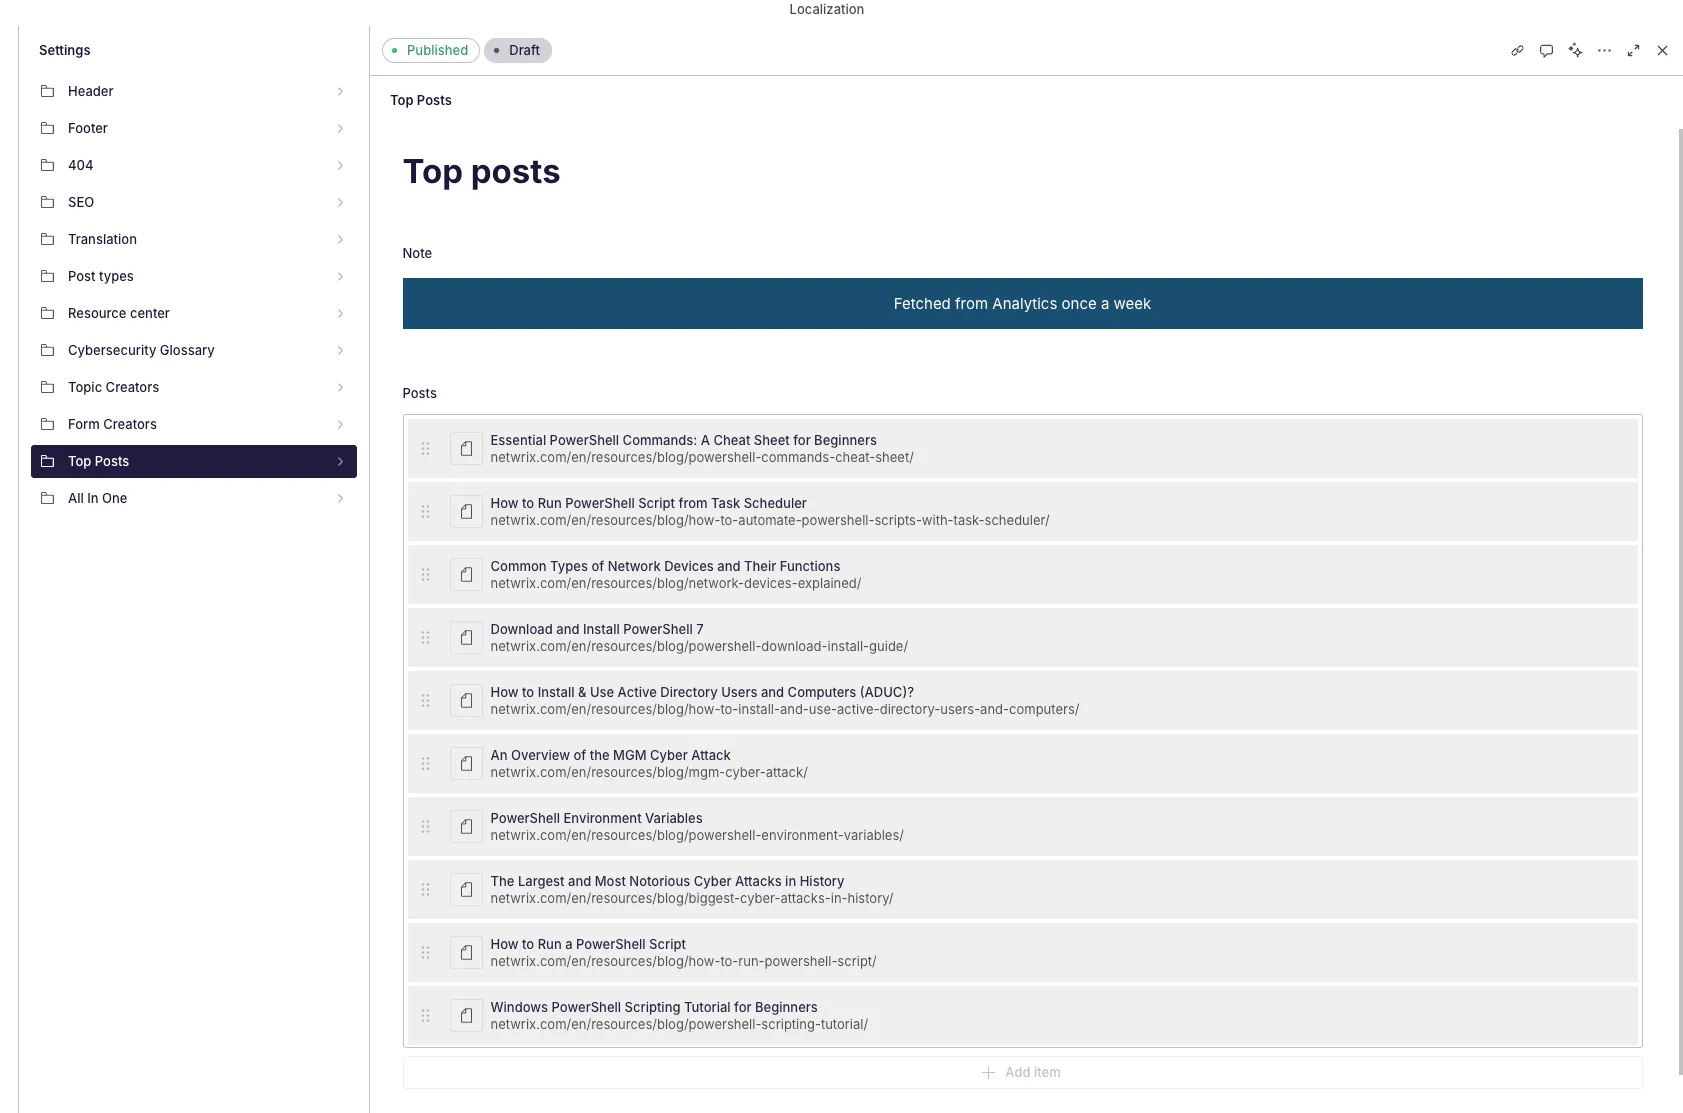
Section titled “Sanity”We have a top_posts schema type in Sanity that holds the repeater with all the posts information.
The schema looks like this:
export default defineType({ name: "top_posts", title: "Top Posts", type: "document", readOnly: true, fields: [ ...note({ text: "Fetched from Analytics once a week", localized: false, options: { aiAssist: { exclude: true } }, }), ...repeater({ title: "Posts", localized: false, fields: [ ...text({ title: "Blog title", name: "blog_title", options: { aiAssist: { exclude: true } }, }), ...text({ title: "Blog URL", name: "blog_URL", localized: false, options: { aiAssist: { exclude: true } }, }), ], preview: { select: { title: "blog_title.en", subtitle: "blog_URL", }, prepare(selection) { const { title, subtitle } = selection; return { title: title || "No title", subtitle: subtitle || "No URL", }; }, }, }), ], preview: { prepare: () => ({ title: "Top posts" }) },});So it’s just a repeater with a localized blog title and a non-localized blog URL. It’s set to read only so no one in the Studio can mess the post information.
Displaying the content in the front end
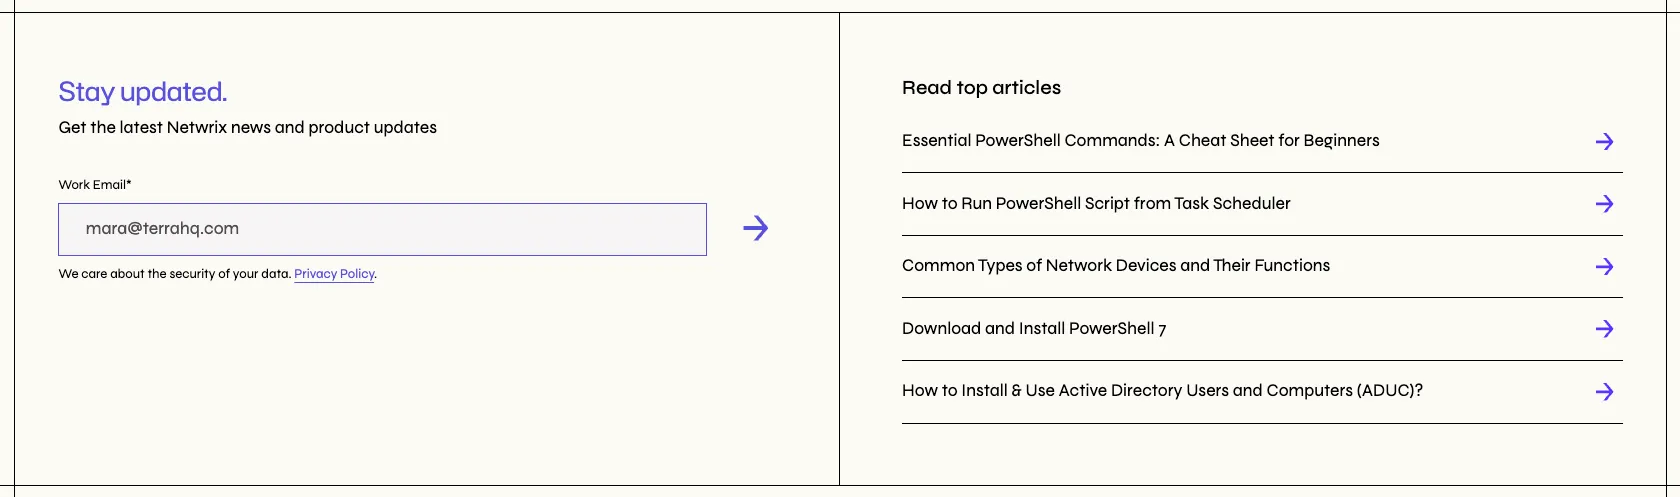
Section titled “Displaying the content in the front end”Back to the frontend, as we stated at the beginning, these posts appear in the Footer and each Blog single.
export function footer({ language = "en" }) { return ` ... 'top_articles': *[ _type == 'top_posts'][0]{ 'repeater': repeater[0..4]{ 'blog_title': blog_title.${language}, blog_URL } }, ... `;export const blogs = ({ language }) => { return ` ... 'related_resources': { ... 'latest' : *[_type == 'blogs'] | order(_createdAt desc)[0...10]{ ${resource({ language, isReference: false })} }, 'top': *[ _type == 'top_posts'][0]{ 'repeater': repeater[]{ 'blog_title': blog_title.${language}, blog_URL } }, ... }, ... `;We use the query in query for both, to fetch the posts and their title adapted to the language we are visualizing.
We then use a helper to process the data and output the final version adapted to the needs of our Btn component:
const topPosts = processAnalytics(single.related_resources.top)export const processAnalytics = (results) => { if(!results.repeater || results.repeater.length == 0) return; const processed = [] results.repeater.map(result => { const slug = extractPath(result.blog_URL) processed.push({ title: result.blog_title, slug, option : "target_self" }) }) return processed;}So here we build the results array again using the target_self option for our button to function correctly.